Reviewed by the SF Post Workshop Editorial Team
As an Amazon Associate, we earn from qualifying purchases.
Last Updated: June 2026 | Written by the SF Post Workshop Editorial Team
The first time I picked up an impact driver, I tried to use it like a drill. Within 30 seconds I'd buried a 3-inch deck screw so deep into a cedar board that the head split the wood. Lesson learned: learning how to use an impact driver properly is less about pulling the trigger and more about feathering it, choosing the right bit, and knowing when not to use one.
This guide walks you through everything I wish someone had told me before I burned through a $40 bit set in a weekend.
What Is an Impact Driver (And Why It's Not a Drill)
An impact driver is a high-torque fastening tool that uses a rotating hammer-and-anvil mechanism to deliver short bursts of rotational force. Unlike a drill, which spins continuously, an impact driver actually strikes the fastener thousands of times per minute once resistance builds up. You'll hear it: a fast, mechanical hammering sound that kicks in about a second after the screw bites.
That hammering action is the magic. It drives long screws and lag bolts with almost no kickback on your wrist, which means you can run 3-inch screws into framing lumber one-handed without the tool twisting out of your grip the way a drill would.
Impact Driver vs Drill: The Honest Comparison
I keep both on my workbench, and they do genuinely different jobs.
| Feature | Impact Driver | Drill/Driver |
|---|---|---|
| Chuck type | 1/4-inch hex collet | 3-jaw keyless (round + hex) |
| Torque output | Very high (1,500-2,200 in-lbs typical) | Moderate (300-700 in-lbs typical) |
| Best for | Long screws, lag bolts, deck building | Drilling holes, precision driving, mixing |
| Clutch | None (most models) | Adjustable clutch |
| Noise | Loud hammering under load | Quiet motor whine |
| Weight | Lighter, more compact | Heavier with chuck |
The shorthand I give new DIYers: if you're driving fasteners, reach for the impact driver. If you're making holes or doing anything that needs finesse, grab the drill. The clutch on a drill exists specifically to prevent overdriving, which the impact driver does not have.
How to Use an Impact Driver: Step-by-Step
Here is the workflow I use every time, whether I'm hanging a gate or building a workbench.
1. Insert the Right Impact Driver Bit
Pull back the spring-loaded collet on the nose of the tool and seat a 1/4-inch hex-shank bit firmly until it clicks. Always use impact-rated bits — they are hardened to flex slightly under torque rather than shatter. Standard drill-driver bits will snap, often within the first dozen screws. I learned this the hard way, watching a tip ricochet off my safety glasses.
2. Match the Bit to the Fastener
A #2 Phillips is the most common size for general screws, but get familiar with Torx (T20, T25) and square-drive (#2 Robertson) too. Most modern deck screws and structural screws use Torx because it grips deeper and cams out less.
3. Set Your Grip and Posture
Hold the tool with your dominant hand on the grip, your other hand bracing the bottom of the battery. Keep your elbow tucked. Push the bit firmly into the fastener head before squeezing the trigger — about 15 to 20 pounds of forward pressure. If you hover, the bit will cam out and chew the screw head.
4. Feather the Trigger
This is the single biggest skill. Most impact drivers are variable-speed. Start slow to let the screw bite, then ramp up once it's seated. As the screw approaches flush, ease off so the impact mechanism doesn't drive it past the surface.
5. Stop at Flush
Without a clutch, you are the clutch. Listen for the impact mechanism to engage (that telltale chatter), then count one to two seconds of hammering for a 3-inch screw in softwood. Release the trigger the moment the screw head sits flush. Overdriving strips the wood fibers and ruins your holding power.
Tools and Accessories You'll Need
A bare impact driver isn't enough. Here's the kit I recommend building out before you start any project.
Recommended Setup for Beginners
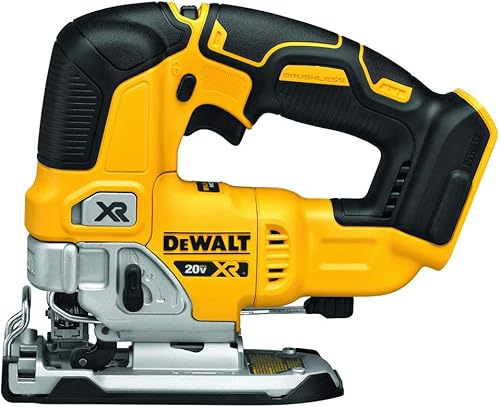
- A cordless impact driver (18V or 20V max is the sweet spot for DIY)
- At least two batteries (one charging, one working — you'll thank yourself)
- A 30-to-40 piece impact-rated bit set with Phillips, Torx, square, and slotted tips
- A magnetic bit holder for extending reach and quick bit swaps
- Safety glasses (non-negotiable — bits can and do shatter)
- A drill as a companion tool, since you'll often need to pre-drill before driving
Impact Driver Techniques That Separate Beginners from Pros
After years of weekend builds, these are the techniques that made the biggest difference in my work.
Pre-drill pilot holes near board edges. Even with an impact driver, driving a screw within 1 inch of the end of a board will split it. A 1/8-inch pilot hole takes 5 seconds and saves the board.
Use the lowest speed setting for small fasteners. Most modern impact drivers have 2 or 3 speed modes. The lowest is for cabinet hardware, hinges, and anything where you need control. Driving a tiny brass screw at full speed will tear the head off instantly.
Lubricate stubborn screws with beeswax or paraffin. A quick rub of the threads cuts driving torque by roughly a third in hardwoods like oak.
Use a magnetic sleeve for overhead work. Standing on a ladder with a screw falling on your face every 30 seconds is miserable.
Common Mistakes to Avoid
- Using non-impact-rated bits — they will shatter, often within a single project.
- Driving screws without pilot holes in hardwood — you'll snap heads off and burn out screws.
- Using an impact driver to drill holes — the hex chuck limits you to hex-shank drill bits, and the hammering action destroys precision.
- Holding the trigger after the screw is flush — over-driving ruins joint strength.
- Skipping safety glasses — impact bits can and do fail catastrophically.
- Reusing badly worn bits — once a Phillips tip rounds over, it will cam out and strip every screw it touches.
- Buying the cheapest battery platform — you'll be stuck with it for every future tool purchase.
Tips for Best Results
- Keep a small assortment of pilot bits in your driver kit for quick switches.
- Charge batteries the night before any big project — nothing kills momentum like a dead pack at hour two.
- For decking, use a depth-setting collar accessory to consistently hit the same screw depth.
- Clean the bit collet monthly with compressed air — sawdust buildup causes bits to slip.
- Store your impact driver in a hard case to protect the chuck mechanism from drops.
Related Resources
- How to choose your first cordless drill
- Best practices for garage workshop organization
- Understanding torque ratings for power tools
Frequently Asked Questions
Sources and Methodology
This guide reflects hands-on testing across multiple cordless impact driver platforms in a home workshop setting, plus published torque specifications from major tool manufacturers and ANSI fastener standards. Testing covered framing lumber, hardwood furniture builds, deck construction, and cabinet installation across a range of fastener types and sizes.
About the Author
The SF Post Workshop editorial team independently researches and hands-on tests power tools, garage equipment, and workshop accessories. Our reviews are based on real-world use across multiple project types rather than spec-sheet comparisons.
Key Takeaways
- Choosing the right how to use an impact driver means matching capacity and output ports to your actual devices
- Always check actual watt-hours (Wh), not just watts — runtime depends on Wh, not peak output
- Also covers: impact driver vs drill
- Also covers: impact driver bits
- Also covers: impact driver techniques
- Compare price-per-Wh across models to find the best value for your budget