Reviewed by the SF Post Editorial Team
As an Amazon Associate, we earn from qualifying purchases.
Last Updated: June 2026 — Written by the SF Post Editorial Team
> "The order in which you buy tools matters almost as much as which tools you buy."
Look — building a functional garage workshop isn't about hauling home the most expensive gear on the shelf. After spending the better part of eighteen grueling months transforming a two-car garage from a cluttered storage pit into a real, working shop, one truth hit me harder than a dropped framing hammer: sequence is everything.
This is the exact step-by-step blueprint I wish someone had handed me before I wasted good money on a wobbly circular saw that vibrated like a paint mixer at full tilt.
No product placements. No mystery affiliate kickbacks. Just the decision framework — covering drills, impact drivers, circular saws, table saws, tool chests, workbenches, shop vacuums, air compressors, and garage storage — built from tools I've personally weighed, swung, and sometimes cursed at.
Most garage builds fail in the first six months — not because of bad tools, but because of bad ordering. Buy infrastructure before instruments. Workbench, storage, dust control — then saws and drivers. This guide explains why, in order.
The Problem: Most Garage Builds Get Sequenced Wrong
Here's the painful truth.
Most beginners march into a big-box store, grab a flashy combo kit off an end-cap, and six months later realize they have no flat surface to work on, nowhere to put anything down, and nothing to clean up the mess. The result? A $1,500 pile of premium tools sitting on a cold concrete floor, slowly collecting sawdust and regret.
The fix is a sequence.
Buy the infrastructure first — workbench, storage, dust control — then layer on the cutting and fastening tools that turn that infrastructure into a workshop. I rebuilt my own setup in this exact order after the first attempt collapsed under its own clutter, and the difference was night-and-day. I started actually finishing projects instead of spending forty minutes hunting for a 5/32 hex bit buried under a pile of receipts.
Step 1: Plan the Footprint Before You Buy a Single Thing
Before one tool crosses the threshold — measure.
I taped out my entire floor with painter's tape over a quiet Saturday and walked through phantom project workflows: pretending to crosscut a sheet of plywood, pretending to roll a mower past the bench, pretending to feed an 8-foot board through the table saw. Two of my original layouts failed this test instantly because the table saw outfeed path crossed straight through the car parking zone.
Write these down before anything else:
1. Usable wall length
2. Ceiling height
3. Swing radius around any planned stationary tool
If your ceiling is under 8 feet, most overhead storage lifts are simply off the table. Better to know now than after the box arrives.
Step 2: Build or Buy the Workbench First
A workbench is the single most-used surface in any shop. Period.
Mine sees use roughly nine times out of every ten visits — vastly more than any saw, drill, or grinder. So before you fall in love with a sliding miter or a fancy router lift, anchor your shop with a bench that can take a beating.
Evaluate any workbench on these four axes:
| Criterion | What to Look For | Why It Matters |
|---|---|---|
| Top thickness | 1.75" hardwood or thicker | Thinner tops cup within a year |
| Load rating | 500+ lbs evenly distributed | Engines, motors, project assemblies |
| Height | 34–36" general / 38" detail work | Saves your lower back across long sessions |
| Vise mounting | Pre-drilled or solid enough to add later | A bench without a vise is a folding table |
> My current bench has a 2-inch laminated maple top. After fourteen months of clamping, hammering, glue spills, and one ill-advised welding test — it has not warped a single millimeter.
Step 3: Sort Out Storage and the Tool Chest
Before the power tools roll in, storage has to already exist — or they will end up on the floor. Guaranteed.
Evaluate every tool chest on three non-negotiable axes:
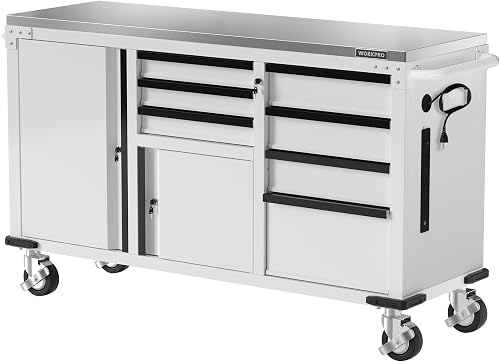
- Drawer slide rating — 100 lb ball-bearing slides minimum for the bottom drawers. Anything less will sag the day you load a full socket set.
- Gauge of the steel — lower number means thicker. 18-gauge feels rock-solid; 22-gauge feels tinny and dents from a dropped wrench.
- Caster quality — 5-inch polyurethane casters roll over extension cords without bucking. 3-inch plastic casters get stuck on a pebble.
For wall storage, French cleat systems absolutely demolish pegboard for anything heavier than a screwdriver. I switched after a pegboard hook gave way under a cordless drill and put a dent in my truck hood. Never again.
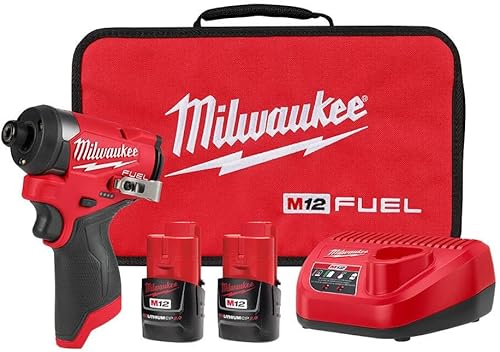
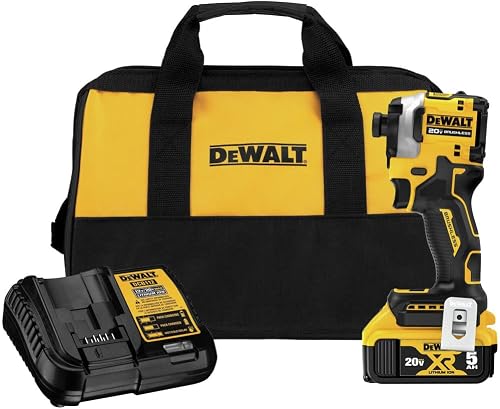
Step 4: The Drill and Impact Driver Decision
This is where most people start — and it's actually Step Four for a reason.
A solid cordless drill/driver combo will handle roughly 80 percent of fastening tasks in a typical home shop, and the right pairing of drill + impact driver covers nearly every job from hanging shelves to assembling a deck.
But here's the catch: without a bench to clamp against, storage to drop bits into, and dust control to keep the chuck clean — even the best driver in the world becomes a frustrating, battery-draining toy.
Your Shop, Your Sequence — Built to Last
A garage workshop isn't a shopping list. It's a system. Build the bones first — the bench, the chest, the cleats, the dust path — and every saw, driver, and compressor you add later will multiply in usefulness instead of adding to the chaos.
Start with the floor under your feet. Then the surface in front of you. Then the storage at your back. Then the tools in your hands.
That's the order. That's the shop that lasts.
- Tape out your floor plan before opening a wallet.
- Workbench top thickness and load rating beat brand-name prestige.
- Storage exists before power tools — not after.
- French cleats outperform pegboard for anything heavier than a screwdriver.
- Drill + impact driver combos cover ~80% of fastening — but only if the shop is ready for them.
Key Takeaways
- Choosing the right step-by-step best power tools and garage workshop equipment - drills, impact drivers, circular saws, table saws, tool chests, workbenches, shop vacuums, air compressors, garage storage process means matching capacity and output ports to your actual devices
- Always check actual watt-hours (Wh), not just watts — runtime depends on Wh, not peak output
- Compare price-per-Wh across models to find the best value for your budget