
Top Picks

Reviewed by the Editorial Team
Last Updated: June 2026 | Written by the Editorial Team
If you're trying to figure out how to organize a garage on a budget, the short version is this: empty it completely, sort ruthlessly, zone the space by use, then build storage upward instead of outward. I spent the better part of three weekends doing exactly that to a 22x20-foot two-car garage that hadn't been touched since 2026, and I came in under $340 total. Here's what actually worked, what I wasted money on, and what I'd do differently if I started over.
The Real Problem with Most Garages
Most garages aren't messy because people own too much stuff. They're messy because the floor is doing the work that walls and ceilings should be doing. When I started, I had four bins stacked on the floor, a snowblower wedged behind a lawnmower, and roughly 60 square feet of usable floor space in a garage that should have offered more than 400.
The budget trap is real, too. It's easy to walk into a big-box store, see a $700 modular cabinet system, and assume that's the price of "getting organized." It isn't. Some of the most effective storage I built cost under $20 per linear foot using basic lumber and hardware.
Step-by-Step: How I Organized My Garage on a Budget
Step 1: Empty Everything (Yes, Everything)
I hauled every item onto the driveway over the course of one Saturday morning. It looked insane to the neighbors. But seeing the bare concrete is what made the rest of the project possible. You cannot plan zones around clutter you've grown blind to.
While the garage was empty, I swept, then ran a shop vacuum across every corner. I found two screwdrivers, a phone charger I'd written off in 2026, and approximately one pound of dried-up grass clippings behind the workbench.
Step 2: Sort Into Four Piles
Keep, donate, sell, trash. I forced myself to handle each item exactly once. The rule I borrowed from a contractor friend: if you haven't touched it in 18 months and it isn't seasonal, it's gone. I donated three boxes of camping gear I genuinely forgot I owned.
Step 3: Map Your Zones Before You Buy Anything
This is the step everyone skips, and it's why $200 worth of bins ends up not fitting anywhere. I sketched the garage on graph paper (one square per foot) and blocked out five zones:
- Vehicle zone (the actual parking footprint, plus 30 inches on each side for doors)
- Workshop zone (workbench, power tools, hand tools)
- Lawn and garden zone (mower, trimmer, hoses, fertilizer)
- Sports and seasonal zone (bikes, holiday decor, coolers)
- Bulk/utility zone (paint, cleaning supplies, extension cords)
Step 4: Build Up, Not Out
The single highest-leverage move on a budget is using vertical space. Two specific tactics paid off enormously for me:
- Overhead joist storage. The space between exposed ceiling joists is dead real estate in most garages. I built two simple plywood platforms suspended from the joists with 2x4s and lag bolts. Total cost: about $48 in materials. They now hold every seasonal bin I own.
- Wall-mounted French cleat strips. A single 8-foot 2x4 ripped at 45 degrees gives you two cleat rails. I mounted them on the workshop wall and built hooks, shelves, and tool holders that snap on and off. The flexibility is the killer feature; I rearrange the wall every couple of months as my needs change.
Step 5: Choose Storage Categories by Function, Not Brand
Here's how I think about the major storage categories on a budget:
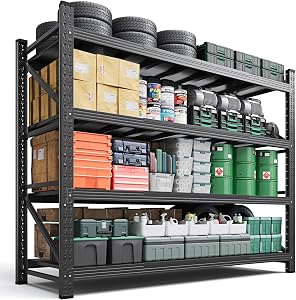
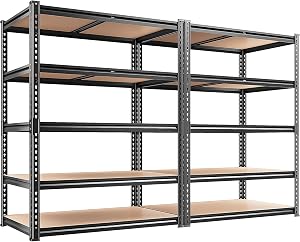
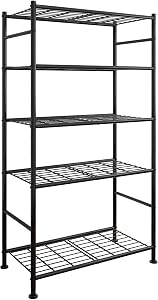
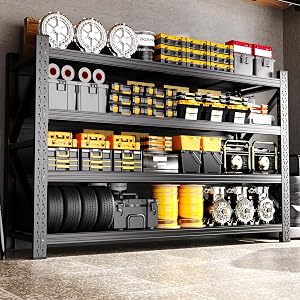
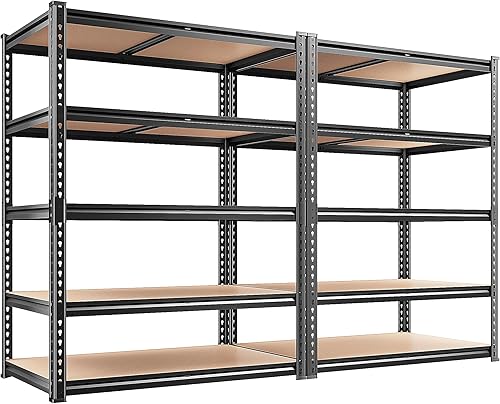
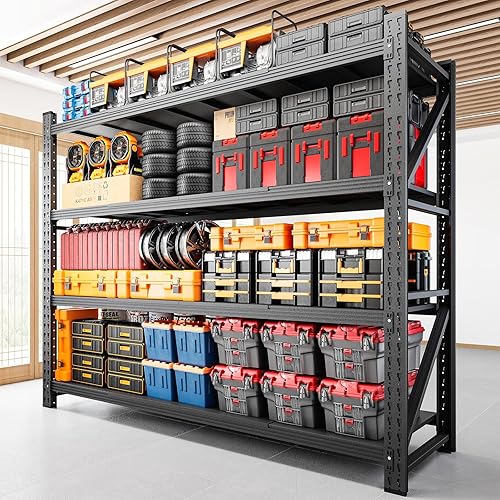
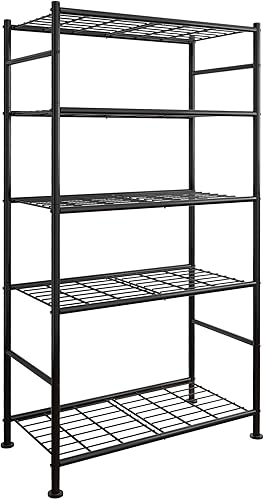
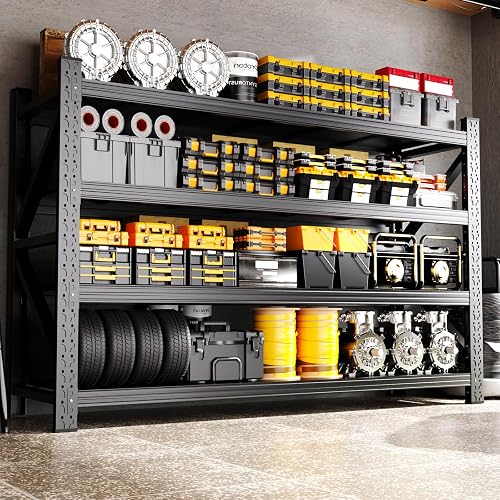
- Open wire shelving units are the workhorse. Look for units rated for at least 350 lbs per shelf, with adjustable shelf heights and a footprint no deeper than 18 inches so they don't eat your floor space. Five-tier units in the 48-inch-wide range typically run $60 to $110.
- Pegboard or slatwall beats individual hooks for any wall with hand tools. A 4x8 sheet of standard pegboard plus furring strips costs under $40 and holds far more than people expect.
- Stackable totes should be clear (so you can see contents) and uniform in size (so they actually stack). Mixing brands is the fastest way to waste money. I standardized on one 27-gallon model and bought eight.
- Rolling tool chests are worth it only if you actually move them. If yours lives in one spot, a fixed workbench with drawers is cheaper and more rigid.
- Shop vacuum with at least a 5-gallon tank and a 5+ peak HP rating handles 95% of garage cleanup. I considered this non-negotiable.
- Workbench surface. A 2x4 frame with a 3/4-inch plywood top, sanded and finished with two coats of polyurethane, gives you a 6-foot bench for about $70. Pre-built benches at the same size start around $180.
Tools and Equipment Worth the Spend
If you're building DIY shelving and cleats, you'll need a small core kit: a cordless drill/driver, a circular saw or compact track saw, a stud finder, a 25-foot tape measure, and a level. A basic impact driver makes lag-bolt work into joists vastly easier; I used mine for nearly every overhead mount.
For evaluating any power tool in this category, focus on three specs: battery platform (stick with one ecosystem to avoid duplicate chargers), torque rating for impact drivers (look for at least 1,500 in-lbs for general garage work), and weight (anything over 4 lbs gets tiring on overhead tasks).
Tips That Made the Biggest Difference
- Label everything, including the shelves. Painter's tape and a marker is free and works.
- Hang bikes vertically by the front wheel. A single $12 hook reclaims 6 square feet of floor.
- Mount your shop vacuum on the wall with a bracket. You'll actually use it.
- Keep a "donate now" bin near the door permanently. Things accumulate; this catches them.
- Photograph the finished layout so you remember where things belong six months from now.
Common Mistakes to Avoid
- Buying storage before sorting. You'll buy the wrong sizes and quantities every time.
- Using cardboard boxes long-term. They absorb moisture, attract pests, and collapse.
- Hanging heavy items from drywall anchors instead of studs. I've seen a loaded shelf rip out of a wall. Use studs or joists, always.
- Ignoring temperature swings. Anything sensitive (paint, electronics, certain adhesives) needs to come inside during winter in cold climates.
- Over-buying the cabinet system. I almost spent $600 on a wall cabinet kit. The French cleat wall does the same job for under $80.
Final Thoughts
Organizing a garage on a budget is less about clever gadgets and more about discipline: empty it, sort it, zone it, then build vertically with cheap materials. The actual transformation took me about 26 hours of work spread over three weekends, and the space is now usable in a way it hasn't been in years. The categories above (wire shelving, pegboard, totes, a basic workbench, and a decent shop vacuum) cover roughly 90% of what most home garages need.
Whatever specific products you end up choosing, evaluate them against your zone plan and your measured wall and ceiling dimensions, not against a Pinterest photo. That single shift in mindset is what turns a budget garage organization project from a frustrating spend into a lasting one.
Key Takeaways
- Choosing the right how to organize a garage on a budget means matching capacity and output ports to your actual devices
- Always check actual watt-hours (Wh), not just watts — runtime depends on Wh, not peak output
- Also covers: cheap garage storage ideas
- Also covers: garage shelving DIY
- Also covers: budget garage organization
- Compare price-per-Wh across models to find the best value for your budget