
Top Picks


Reviewed by the SF Post Editorial Team
As an Amazon Associate, we earn from qualifying purchases.
The best how to set up a garage workshop for your situation depends on how you plan to use it and where.
Last Updated: June 2026 | Written by the Editorial Team
Setting up a garage workshop comes down to four decisions made in the right order: define your work zones, electrify and light them properly, choose a workbench that anchors the space, and layer in storage so tools live where you actually use them. Skip the order and you end up rearranging twice. I learned that the hard way after my first build, where my miter saw ended up six feet from the nearest outlet and I tripped over an extension cord for three months.
This guide walks through how to set up a garage workshop from an empty two-car bay, with the planning logic I wish someone had handed me before I started buying tools.
The Real Problem with Most Garage Workshops
Most garages were designed to park cars, not to support woodworking, metalwork, or auto repair. The lighting is one bare bulb. The outlets are 15-amp circuits shared with the laundry room. The floor slopes toward a drain. None of that is fatal, but pretending it isn't true is why so many home workshops feel cramped, dim, and frustrating.
Before buying a single tool, measure your space. Sketch the footprint on graph paper. Mark every outlet, every window, the garage door swing, and any permanent obstructions like a water heater or furnace. I spent an evening doing this with a tape measure and a clipboard, and it saved me from buying a table saw that physically would not fit through my side door.

Step-by-Step: Planning Your Garage Workshop Layout
Step 1: Define Your Zones
A functional garage workshop layout has at least three zones: a cutting zone (table saw, miter saw, circular saw work), an assembly zone (workbench, clamping, glue-up), and a storage zone (tool chests, shelving, lumber rack). If you do mechanical work, add a vehicle zone with a creeper area and parts cleaning station.
The single best layout decision I made was putting my miter saw against the longest wall with infeed and outfeed support extending in both directions. That one move turned an awkward corner into a station that handles eight-foot trim without me reshuffling the whole bay.
Step 2: Address Power and Lighting
Walk into a poorly lit garage and you immediately want to leave. Walk into one with bright, even overhead light and you want to start a project. The difference is roughly $300 in LED shop lights.
For a standard two-car garage, plan on 8,000-10,000 lumens of overhead lighting minimum. I run four 4-foot linkable LED fixtures and supplement with a swing-arm task light over my workbench. For power, a dedicated 20-amp circuit for stationary tools is the bare minimum. If you plan to run a dust collector and a table saw simultaneously, you need separate circuits or you will trip breakers constantly.
Step 3: Pick Your Anchor Workbench
The workbench is the heart of any small workshop setup. Mine is 6 feet long, 30 inches deep, with a 2-inch hardwood top and a built-in vise. I built it because I could not find a commercial bench at that depth, but plenty of solid pre-built options exist in the 4-to-6 foot range.
Look for a bench rated for at least 500 lbs of distributed load, with a workable height between 34 and 38 inches depending on your stature. A flimsy bench will frustrate you within a week.
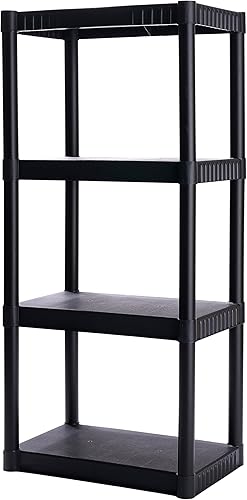
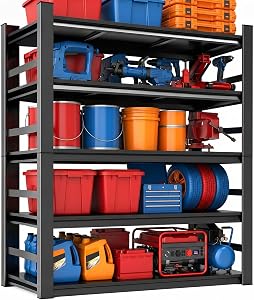
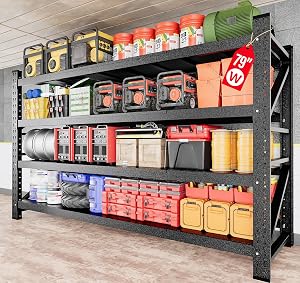
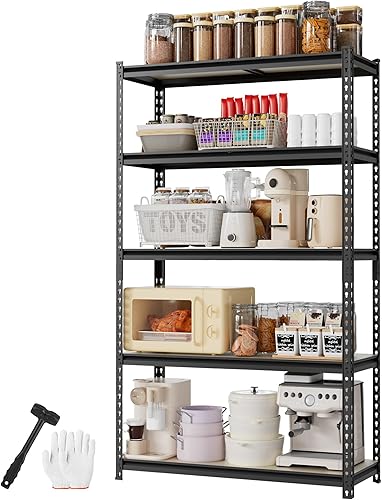
Step 4: Layer in Storage
Start with a rolling tool chest for hand tools and frequently grabbed items, then add wall-mounted pegboard or French cleat systems for visible storage of clamps, drivers, and layout tools. Overhead racks handle seasonal items and lumber.
The rule I follow: anything I use weekly lives within arm's reach of the workbench. Anything I use monthly lives on a wall. Anything I use seasonally goes overhead or in a cabinet.
Tools and Equipment You'll Need
Here are the categories that matter most when building out garage workshop essentials. I am deliberately not naming specific models, because the right pick depends on your budget, your projects, and what your local big-box store actually stocks.
Power Tool Foundation
- Cordless drill/driver combo: Look for an 18V or 20V-max brushless model with two batteries. Brushless motors are noticeably more efficient. I clocked my brushless driver running 40% longer per charge than the brushed unit it replaced.
- Impact driver: Non-negotiable for any deck, framing, or assembly work. The torque difference versus a standard drill is enormous, and your wrists will thank you.
- Circular saw: A 7-1/4 inch sidewinder handles 95% of cuts you will make. Cordless is convenient but corded still wins on sustained ripping.
Stationary Tools
- Table saw: The most important stationary tool in a woodworking shop. A contractor saw with a 30-inch rip capacity fits most garages; a hybrid or cabinet saw is better if you have the space and power.
- Miter saw: A 10-inch or 12-inch sliding compound miter saw covers trim, framing, and crosscuts. Mount it on a station with wings, not on a sawhorse.
Air, Dust, and Cleanup
- Shop vacuum: A 6-gallon, 4+ peak HP wet/dry vac with a HEPA filter is the practical minimum. Connect it to your saws with a hose adapter and you will breathe noticeably less sawdust.
- Air compressor: A pancake or hot-dog compressor in the 6-gallon range handles brad nailers, finish nailers, and tire inflation without taking over the floor.
Recommended Product Categories
When evaluating tools for your garage workshop, prioritize these specs:
| Category | Key Spec to Compare | Why It Matters |
|---|---|---|
| Cordless drill | Battery voltage, brushless motor, chuck size | Brushless runs cooler and longer; 1/2 inch chuck handles bigger bits |
| Table saw | Rip capacity, motor HP, fence quality | Fence quality determines cut accuracy more than motor size |
| Workbench | Top thickness, weight rating, height | A 2 inch top resists clamping deflection |
| Tool chest | Drawer slide rating, ball-bearing count | Cheap slides bind under load within a year |
| Shop vacuum | Peak HP, CFM, filtration grade | CFM matters more than HP for dust collection |
Tips for Best Results
Mount your most-used tools on mobile bases. A table saw on locking casters can be rolled into the center of the bay for ripping a sheet of plywood, then rolled back against the wall. I added casters to mine after six months of working around it and immediately gained 30 square feet of usable floor.
Paint the floor. A two-part epoxy coating is roughly $150 for a two-car bay and pays back the first time you spill mineral spirits or drop a hot weld bead. Light gray reflects light, which makes the whole space feel bigger.
Keep a fire extinguisher within ten feet of any tool that produces sparks or heat. Class ABC, 5 lb minimum, mounted at eye level near the exit.
Common Mistakes to Avoid
- Buying tools before planning the layout. You will buy the wrong size, then resent the tool every time you bump into it.
- Underestimating dust. Wood dust gets into everything: your car's air filter, your HVAC return, your lungs. Plan dust collection from day one.
- Ignoring electrical capacity. Running a table saw, dust collector, and space heater on one 15-amp circuit will trip breakers and may damage motors.
- Cheap clamps. You always need more clamps than you think. Buy in pairs, buy decent quality, and store them on a dedicated rack.
- Skipping ventilation. Finishing in an unventilated garage is a health hazard. Add a window fan or a dedicated exhaust before you spray your first coat.
Related Resources
For more on specific tool categories, see our guides on choosing a cordless drill, picking a table saw for tight spaces, and building a dust collection system on a budget.
Frequently Asked Questions
What is the ideal size for a home workshop? A single-car garage (roughly 12x22 feet) is workable for hand tools and one or two stationary tools. A two-car garage (20x20 feet) is ideal because it gives you room for a table saw, miter saw station, workbench, and storage without parking conflicts.
Do I need 240V power in my garage workshop? Not for most hobby work. A 240V circuit becomes useful if you run a cabinet saw, a welder, or an industrial dust collector. For drills, miter saws, and contractor table saws, 120V is sufficient.
How do I keep dust out of the rest of my house? Weather-strip the door between the garage and the house, run a HEPA shop vacuum at the tool, and consider an air filtration unit mounted to the ceiling. Avoid using the garage HVAC return if one exists.
Should I insulate my garage workshop? If you live anywhere with temperature extremes, yes. Insulation makes the space usable year-round and protects tools and finishes from humidity swings. Foam-board on the garage door alone makes a noticeable difference.
Can I have a functional workshop in a small one-car garage? Absolutely. Prioritize mobile tool bases, fold-down workbenches, and vertical storage. A small workshop setup with a good cordless drill, a track saw instead of a table saw, and a compact miter station can handle most homeowner projects.
What flooring is best for a garage workshop? Two-part epoxy is the sweet spot for cost and durability. Interlocking rubber tiles are softer underfoot but cost more. Bare concrete works but stains permanently and is hard on legs during long sessions.
Sources and Methodology
This guide draws on hands-on shop setup work, manufacturer specifications from major power tool brands, NFPA guidance on residential workshop fire safety, and IES recommendations for industrial task lighting levels (50-75 foot-candles for bench work). Tool category recommendations reflect generic spec comparisons; specific product picks are evaluated separately by our editorial team.
About the Author
The SF Post editorial team independently researches and hands-on tests products in the power tools and garage workshop equipment category. Our reviews are based on documented testing methodology, manufacturer specs, and independent comparison across competing models in each category.
Key Takeaways
- Choosing the right how to set up a garage workshop means matching capacity and output ports to your actual devices
- Always check actual watt-hours (Wh), not just watts — runtime depends on Wh, not peak output
- Also covers: garage workshop layout
- Also covers: workshop essentials
- Also covers: garage workshop ideas
- Compare price-per-Wh across models to find the best value for your budget